Use this link to get to the attendance sheet in Google Drive, or find the attendance sheet however you like to.
2. A New Quiz Site
Our OBJECTIVE today is to understand quizizz.com and the role it can play in our classrooms. We will accomplish this by comparing Quizizz to Kahoot, a quiz platform we are already familiar with.
Step 1: Let's play Kahoot. Go to kahoot.it in your internet browser. Most of us are familiar with Kahoot, so let's play a short quiz together to remind ourselves the role this familiar quiz platform can play or does play in our classrooms.
How is Kahoot best used in your classroom? What are its pros? Its cons?
Step 2: Now let's look at a new quiz platform. Go to quizizz.com and click on Join a Game in the upper right. Follow the instructions projected on the white board to play this Christmas quiz.
How is Quizizz similar to Kahoot? How is it different? What are Quizizz's strengths and weaknesses, and what role might it have in your classroom?
3. The Challenge
As we head into and out of this break, be mindful of the tools that will help you harness student engagement and provide assessment and re-teaching opportunities. When teen and pre-teen brains have let loose of some of the concepts we've taught, consider tech tools like Kahoot and Quizizz that can help refocus and remind those young minds!
SAMR is an acronym that stands for Substitution,
Augmentation, Modification, and Redefinition, labels that define the
levels of tech integration for any given activity.
Our
OBJECTIVE today is to understand SAMR well enough to be able to evaluate
and justify the level of tech integration in our own classrooms. We'll achieve this level of understanding by completing two activities with a partner.
When it comes to technology, the
appropriate question isn't, "Are you using tech?" The question should
be, "Why are you using tech?" Understanding the SAMR levels helps us
articulate the depth of tech integration and the benefits of that level.
Let's start by exploring the SAMR levels.
Introductory Video: Here is SAMR creator Dr. Rueben Puenteduro explaining SAMR (Jim Cash, YouTube)
Let's use this Padlet wall and content partners (or as close to content as you can get!) to practice applying the SAMR levels. See the Padlet wall for instructions.
Use the same Padlet wall from above, but this time, you and your partner think of an activity from your content area. This could be a common activity, or it can be something specific from a unit. Take the activity through the 4 levels of SAMR. Show us what the activity would look like at the Substitution leve, the Augmentation level, the Modification level, and the Redefinition level. Create a sticky note on the Padlet wall with your names on it and the activity in the 4 different levels.
Here's my example:
5. Finally...It's NOT a Contest!
Use technology with your students at the APPROPRIATE level for your
students and the task at hand. There is no prize for hanging out in the
deep end every day -- you'll be frustrated, and your students will be
exhausted. Move back and forth, in and out, as needed. Use the prompts
on the Blue Valley SAMR Instructional Design document as a guide and as justification for your SAMR levels!
6. Your Challenge!
Be MINDFUL of how and why you are using tech
in the next week. Being able to articulate, even to yourself, that you
are using Kahoot to increase engagement or Showbie because it tends to
motivate students to complete their work is powerful. It will also open
up the creative floodgates, and you'll soon be thinking of other ways to
increase efficiency, engagement, and motivation in your classroom.
Technology is a hook; don't be afraid to use it at whatever level works!
Use this link to mark your attendance today, or get into Google Drive and search for the DCMS Tech Training Attendance sheet.
Explorers, we're working with memes. Go to imgflip.com & use the Create button in the upper left to get creative!
2. Project Work Time
Last time we met, we talked about picking a lackluster spot in a unit and designing an activity to add some sparkle. Continue working on this activity and post your progress on the padlet below.
Use this link or your Starred Drive in Google Drive to take attendance on the spreadsheet
Explorers: Since we just came off of a project cycle, we'll take a look at Skitch (agenda here).
2. Pick a Project!
You DO NOT want to integrate technology in your classroom just for the sake of technology, but you SHOULD be cognizant of lessons or material that might be a bit lackluster. These dull spots are the perfect places to insert some shiny tech applications to increase excitement and motivation in your classroom!
Our OBJECTIVE today is to identify a dull spot in one of our units and create a lesson utilizing technology to increase the student engagement and understanding there.
We've "studied" Socrative, Padlet, Skitch, and EdPuzzle lately, but you are certainly not limited to these apps or sites. Get creative, work together, and make magic happen in your classroom!
3. Publish To Inspire!
Committing to a project by putting it in words will help keep you accountable, but the main reason we share what we're working on is to allow others to be inspired by our ideas. Teachers come up with great ideas, and creativity breeds creativity. Share out so others can benefit!
Let this project roll around in your head until our next Tech Tuesday, or work on it a bit between now and then. The choice is totally yours. We'll have work time again next Tech Tuesday, and we can't wait to see your new lesson!
SAMR is an acronym that stands for Substitution, Augmentation, Modification, and Redefinition, labels that define the levels of tech integration for any given activity.
Our OBJECTIVE today is to understand SAMR well enough to be able to evaluate and justify the level of tech integration in our own classrooms. The appropriate question isn't, "Are you using tech?" The question should be, "Why are you using tech?" Understanding the SAMR levels helps us articulate the depth of tech integration and the benefits of that level.
Let's start by exploring the SAMR levels via an introductory video and handouts.
Let's use this Padlet wall and content partners to practice applying the SAMR levels. See the Padlet wall for instructions.
4. Apply SAMR to YOU!
Use the same Padlet wall from above, but this time, you and your partner think of an activity from your content area. This could be a common activity, or it can be something specific from a unit. Take the activity through the 4 levels of SAMR. Show us what the activity would look like at the Substitution level, the Augmentation level, the Modification level, and the Redefinition level. Create a sticky note with your names on it and the activity in the 4 different levels.
5. Finally...It's NOT a Contest!
Use technology with your students at the APPROPRIATE level for your students and the task at hand. There is no prize for hanging out in the deep end every day -- you'll be frustrated, and your students will be exhausted. Move back and forth, in and out, as needed. Use the prompts on the Blue Valley SAMR Instructional Design document as a guide and as justification for your SAMR levels!
6. Your Challenge!
Be MINDFUL of how and why you are using tech in the next week. Being able to articulate, even to yourself, that you are using Kahoot to increase engagement or Showbie because it tends to motivate students to complete their work is powerful. It will also open up the creative floodgates, and you'll soon be thinking of other ways to increase efficiency, engagement, and motivation in your classroom. Technology is a hook; don't be afraid to use it at whatever level works!
Use this link
to get to the attendance sheet in Google Drive (clunky!), OR go find
your attendance sheet in the STARRED DRIVE of your Google Drive (if you
starred it!).
2. Your Challenge From 10.28.15
Last week's challenge: Work today to start getting set up and challenge yourself to do
something SMALL using your system. This way, you'll know what questions
you have!So...? What questions do you have or what did you run into?
3. Moving A Step Forward -- Videos!
One major reason for moving your classroom into the digital realm is so that you have a way to STORE and DELIVER video content easily to your students. Videos of lessons come in quite handy when a student has been absent or when a student needs more time with the content. Getting yourself set up digitally is HALF the battle. The other half is MAKING SOME VIDEOS!!
Our OBJECTIVE today is to understand a few video tools that are easy to use well enough so you can begin to create some of your own videos. We'll do this by looking at a teacher-made video using the iPad video camera and a Show Me video made with the Show Me app. If time allows, we'll quickly demo the Show Me app so you can get to creating!
4. Use the iPad Video Camera -- It Really Can BE That Simple!
Making a content video does NOT have to be difficult. Many teachers simply prop the iPad up close to the whiteboard and get started. Consider your very own Rachael Friess! What are the pros and cons of this type of video? What are some important tips to make these successful? Here's another example from Mr. Castro, DCHS.
Play around with Show Me enough that you're comfortable making a short content video. Don't worry about it being perfect. Bring your video back to team time so we can learn from each other!
Use this link or your STARRED DRIVE in Google Drive to access the attendance document
Explorers -- Piktochart, Part 3 (Bring your laptops, & we'll continue working on your projects!)
Spartans -- Skitch Follow Up (Bring your iPads and a digital image in an upcoming unit that would work well for a labeling/explaining assignment)
All Stars -- EdPuzzle work time (Bring your laptops)
2. Labeling/Explaining (Skitch) Challenge from 10.20.15
Our CHALLENGE from last time:How
can YOU measure student learning in YOUR CLASSROOM using a tool like
Skitch? Challenge yourself to include a labeling or explaining
assessment or check for understanding between now and Nov. 3. Bring it
back then and tell us how it went!
3. EdPuzzle Refresher (Laptops!)
I try to title each agenda blog post with the pedagogy or methodology that best reflects the area the tech supports, but that was especially difficult this time. EdPuzzle helps us do SO many things that I couldn't pick just one!
EdPuzzle (edpuzzle.com) allows teachers to pull in videos (or use videos already pulled into the site) and embed activities like questions and comments into them, making video lessons interactive and individualized. No more stopping for whole group discussion when you know that some got it and are ready to move on and others are lagging far behind and need to catch up. When you embed the discussion and CFU activities INTO the video, each student or pair of students can progress at the appropriate speed, rewatch as necessary, and demonstrate their INDIVIDUAL understanding of the content. Because of these advantages, EdPuzzle is a great tool to check for understanding, measure student learning, and increase student engagement. Someone once said that iPads (devices) "put every student on the front row," and EdPuzzle definitely illustrates that concept!
Our OBJECTIVE today is to become comfortable enough with EdPuzzle to have it as a resource in our classrooms to check for understanding and increase student engagement.We'll accomplish this by reviewing EdPuzzle's features as a group and then individually searching for content and exploring the editing features.
A. What can EdPuzzle help us do?
Here's an edited video most of us are familiar with. Let's think about how these changes may make this video more effective in the classroom.
B. How do we do this in EdPuzzle?
Here's a video tutorial you can use later for reference!
C. Look and play
4. Your Challenge
Do you plan on incorporating video as a teaching tool sometime between now and November 17? If you do, consider using EdPuzzle to deliver and individualize this content. Let me know if you need help, and bring your activity back to us on Nov. 17. We'd love to hear how it went -- the good, the bad, and the "Oh, wow. I didn't think of that" ('cause that always happens!).
Use this link or your STARRED DRIVE in Google Drive to access the attendance sheet. I know the attendance sheet is labeled today for the Electives Team's topic, but go ahead and mark your attendance in the column.
Our OBJECTIVE today is to understand basic Polyvision Board maneuvers so that we can begin to use them more to increase student engagement in our classrooms. We will accomplish this goal via peer coaching and a video tutorial.
A. Are our boards working?
B. Who uses their board, and how do you use it?
C. Video tutorial -- Eno Board Training Video
3. Our Challenge
Let's CHALLENGE ourselves to make sure our boards are functional (call or email technology with a work order) and try to use them at least in a small way in the next two weeks! This way, we'll know what questions we have.
Use this link to get to the attendance sheet in Google Drive (clunky!), OR go find your attendance sheet in the STARRED DRIVE of your Google Drive (if you starred it!).
2. Blended Learning -- Getting Set Up
Our OBJECTIVE today is to more fully understand what system we'll each use to store and deliver curriculum to our students. We'll accomplish this by actually setting up our chosen system. This is work time, so ask questions as you run into them!
B. Showbie -- You can also use either your laptop (showbie.com) or your iPad (Showbie app). Create an account. You will use the WRENCH icon in the upper left to create classes, add assignments, etc. Mr. Alfrey is your SHOWBIE EXPERT, so definitely let him guide you!
C. Don't want a "system"? That's okay. You'll need some way to store and deliver videos or material, though, so consider using folders and files in Google Drive (hyperdocs).
3. Your Challenge
Work today to start getting set up and challenge yourself to do something SMALL using your system. This way, you'll know what questions you have!
4. Anonymous Feedback
Want to tell me something anonymously? Use this link!
I'm not loving how the attendance Google Sheet is working as a link here, so remember that you can always star a file so that it appears in theSTARRED DRIVE in Google Drive!
Wrap Up from Oct. 6, 2015, Tuesday Tech Day -- Who’s used Padlet, and how did it go?
(Explorers -- Piktochart, Part 2 -- A brief look at blocks in the Piktochart templates and then WORK TIME!!! Bring your laptops to the conference room). Click here for the agenda.
2. Measuring Student Learning (bring your iPads
Our Objective today is to learn or review Skitch so it is available to us in our classrooms as a tool to measure student learning.
Skitch is an iPad app (available for Mac, also) that allows students to label and explain on an image using arrows, text, and drawing.
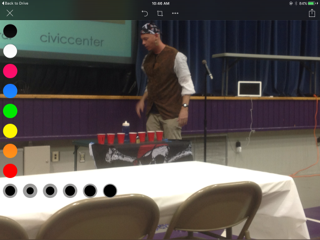
Today, we’re going to learn basic maneuvers in Skitch by labeling TLAP hooks on a picture from our district TLAP inservice.
Let’s look at the tools in Skitch by annotating a picture together! We’ll identify the TLAP hooks we see in play in this picture from our district TLAP inservice:
4. Your Turn!
Go find a folder titled Skitch Practice Photos TLAP in your Shared Drive in Google Drive. Pick ONE photo you’d like to work with and send it into Skitch by using the 3 dot menu (right side) and choosing Open In and Open In. Choose Skitch.
Use the list of TLAP hooks provided and decide which 2-3 hooks you see at use in the picture. Use arrows & text to label these hooks.
5. Publish it!
When you’re finished annotating your image in Skitch, use the Share box (box with arrow out; upper right) and then the Photos icon to send your Skitch image to your camera roll.
Click here to get to our DCMS Skitch Padlet wall and follow the instructions to upload your Skitch image to the wall!
6. Classroom Applications
How can YOU measure student learning in YOUR CLASSROOM using a tool like Skitch? Challenge yourself to include a labeling or explaining assessment or check for understanding between now and Nov. 3. Bring it back then and tell us how it went!
Want To Leave Feedback Anonymously? Use This Google Form!
I'm not loving how the attendance Google Sheet is working as a link here, so let's take a look at the STARRED DRIVE in Google Drive
2. Blended Learning -- bring your iPad and/or laptop
Our Objective today is to acquaint you with a few learning management systems (LMS) that will support a blended learning environment so that you can ultimately choose a system that will best work for you and your classroom. We'll look specifically at hyperdocs, Google Classroom and Showbie.
In our planning session a few Wednesdays back, we landed upon Blended Learning as a topic we were interested in because we all understand the need to have a way to deliver instruction to students who have been absent or to students who need to see or hear things more than once. Video is a powerful tool, and the most difficult part of providing instructional videos to our students is finding a way to organize and house them.
There are many solutions to this dilemma, but three very easy solutions are Google Hyperdocs (fancy name for documents with hyperlinks), Google Classroom and Showbie. Classroom and Showbie are learning management systems, but neither LMS involves difficult set up, and each platform offers its own pluses.
Let's look at each platform so you can decide which one works best for you. Then, let's get started setting them up.
1. Google Hyperdoc -- Use this link to open this folder in Google Drive where I would create and store hyperdocs for each unit. A hyperdoc is a document file that contains hyperlinks to various resources. It works similar to a web page or blog post without having to mess with the fancy parts of a web site or blog.
2. Google Classroom -- To set your own up, go to classroom.google.com on Safari or Firefox (Classroom doesn't like Internet Explorer). Classroom does have an app. All the tools are the same, but the layout is a bit different.
3. Showbie -- To set up your own account, go to Showbie.com on the internet, or download the Showbie app on your iPad.
There are MANY other options when it comes to housing and delivering content in your classroom. The trick is to find one that you're comfortable with and just get started!
Your challenge before we meet again for tech is to think about your needs and decide which type of system will work best to house and deliver content for your students!
"...students who don't quiz themselves (and most do not) tend to overestimate how well they have mastered class material" --From Make It Stick (Brown, Roediger III, and McDaniel)
I'm not loving how the attendance Google Sheet is working as a link here, so let's also look at the STARRED drive!
2. Checking for Understanding--Padlet (bring iPad or laptop)
Explorers--Piktochart (bring laptops) Voyagers--Socrative Quick Question (bring iPads) All Stars--EdPuzzle (bring laptops) Our Objective today is to learn or review Padlet and consider it as an option in our collection of Check For Understanding (CFU) tools to use with our students. Padlet is a web-based tool that has been around for a while, but they recently released the Padlet app, which puts Padlet at teachers' fingertips. Many of us have Padlet accounts and have used Padlet with our students, but we often forget what a powerful tool it can be for collecting student responses.
Last Tech Tuesday, we talked about the importance of checking for understanding in our classes and looked at Socrative Quick Question as an at-our-fingertips tool for this purpose. Our challenge was to purposefully incorporate a Check For Understanding (CFU) to bring back to Tech Tuesday to share, so...LET'S SHARE!
Use this link to post a recent CFU you've used in the classroom on our PADLET WALL!
Our challenge today is to create and use a CFU Padlet wall before our 10/20 Tech Tuesday! What will this look like in your classroom? We can't wait to see!
Want To Leave Feedback Anonymously? Use This Google Form!